Bungee Cord Installation Procedure
The bungee cords have a shelf life of 5 years out of direct sunlight and heat. The link below shows how to figure the date of manufacture by the color code
The following are additional comments for replacing the bungees. Refer to the procedure Maurice Taylor has provided [following]; my comments and/or referencing Maurice’s procedure i.e. #X. it might make more sense if you read Maurice’s instructions before you read these first pages.
I’ve also been asked what a reasonable time would be to do this; one hour if you are wicked-fast and can hit the hole, 1-1/2 hours would be a more-normal guess, especially if you have to fumble around with large arms that don’t fit well into the opening. The electric-flap airframes have an additional panel opening that makes life a bit easier.
One needs the airplane on jacks and the tail tied; allow 15 minutes for placing the airplane on jacks and removing again.
#2. The procedure I have found most efficient for the bungees is as follows. With the airplane raised on jacks and the tail tied, open the 30-amp CB for the gear motor, disconnect the landing gear transmission and swing the gear a bit to get it away from over-center and block the nose wheel with a 2×4 as shown in the photo below. Obviously you will have to remove the wood block to again reattach the transmission. Don’t forget to reset the CB.

#9. Lubricate with a tiny amount of Lubriplate® Aero on the threads and the bracket/bolt contact area, then reinstall. I suggest one-turn away from contact; there’s plenty of thread engagement.
#10. You can proceed from here as suggested by Maurice, however an even easier trick is to remove the clevis screw at the side brace stud, and thus allowing more freedom of movement of the strut asm, and you won’t need the helper as suggested in as suggested in Maurice Taylor’s instructions. See the [finger pointing] photo below.

Additional Comments
Hans Neubert [the Hansmeister] suggests replacing the bungees annually; they lose a significant portion of the force exerted over new ones after 1 year.
When you reinstall the access panels behind the rear spar, on the Twin Comanche models these covers are supposed to be sealed; the following from section 7-24-W in the TCSM.
Bungee access cover panel to be sealed with 1/8 inch bead of black 3M sealer #1126, applied to access opening flange.
Now is the opportunity to check the bungee roller at the bungee arm, if it doesn’t rotate it’s obviously seized. This bungee bushing issue unfortunately is most common; it has swelled inside the roller from overtightening the ¼” bolt. The solution – I’ve written a separate article concerning these rollers which is found on my website under “Landing Gear”.
If yours are not seized, clean and lubricate the bushing and roller contact area with a tiny amount of Lubriplate® Aero. Tighten the ¼” bolt to the point of contact with the bushing, plus just a little more torque, and check for free rotation. As you tighten the bolt observe whether there is some prevailing torque; if not then the nut plate on the bungee arm has lost its locking effect and will need to be replaced.
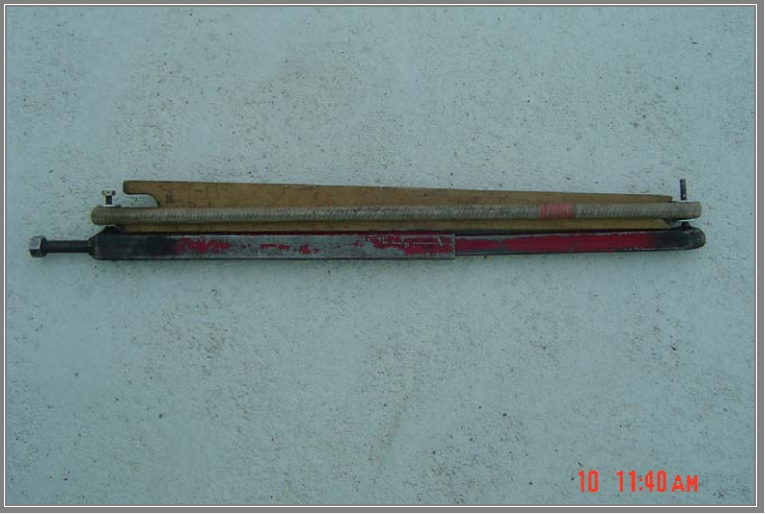
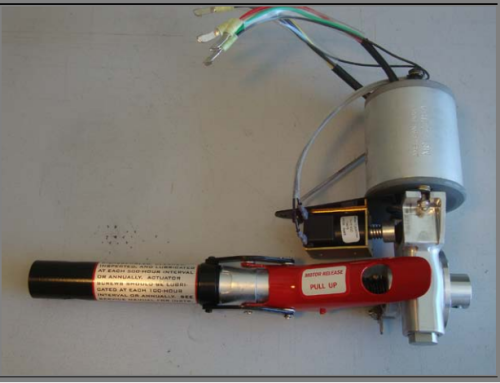
Bungee tool available for loan to current ICS members. This is the tool Maurice refers to in his instructions.
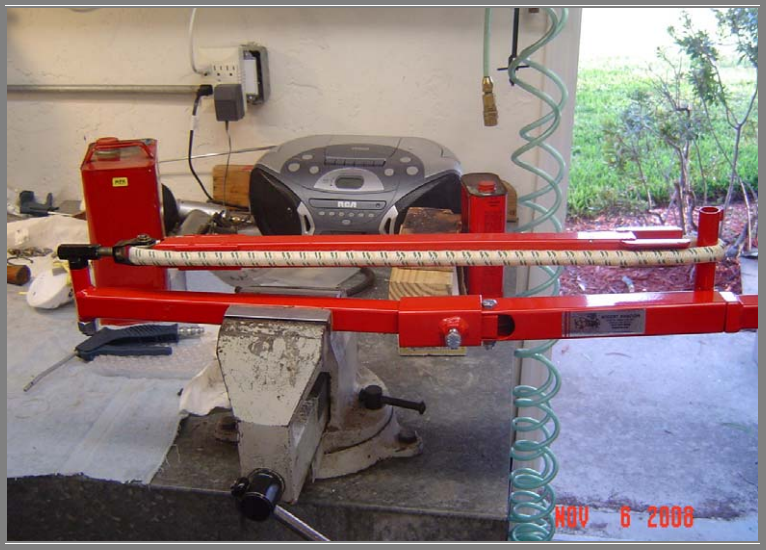
Another bungee tool version from Bogert Aviation. You’ll need a rock-steady vise attached to a heavy bench to use this.
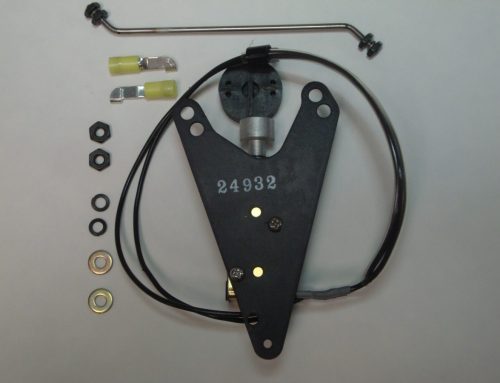
Landing Gear Bungee Rollers
While replacing the bungee cords be prepared to find seized bungee rollers; and after 54 years of misunderstood service I bet that many of them are seized.

Note – this photo illustrates an improper installation of the roller on the bungee arm.
Bungee Roller Notes
The bungee rollers by design are supposed to rotate during landing gear operation. This applies to both rollers but specifically addressed here is the one located at the bungee arms. The bushing P/N 14175-50 is captured as illustrated below. Also note the location of the 2 washers, the 5/16″ washer is against the roller, and the 1/4″ washer is next to the arm; no washer is located under the head of the bolt. This configuration by design allows the rollers to rotate.
Here’s the problem; most installations after 45 years of service have been overtightened thus compressing the thin-wall bushing which then prevents movement of these rollers. At your next bungee change check for this seized condition.
Here’s the solution; if you choose to pursue. Since this bushing is NLA you can make your own [owner produced] using 5/16″ O.D. x 1/4″ I.D. 4130 seamless tubing [Aircraft Spruce]. The O.D. of this tubing needs to be turned in a lathe to properly fit the I.D. of the roller. The length of this bushing should be equal to the bungee roller’s length, plus the thickness of a 5/16″ thick washer, plus 0.010″ to 0.015″ to allow for freedom of movement. You’ll have to carefully drive the damaged bushings out of your bungee rollers.
An installation hint; use a little Lubriplate® on the bushing [this lubrication applies to the clevis pin/roller combination at the outboard end too], assemble as in the illustration below, tighten the AN4 bolt only until you feel bushing capture, plus a little more torque. Do not over-tighten this bolt! The rollers do not need to be removed during bungee installation if you are using the Bogert Aviation Bungee Tool. I have a couple of the ICS tools from the loan program that also do not require removal of the bungee roller.
There you have it, another little problem-solver from the Gear Meister Matt.

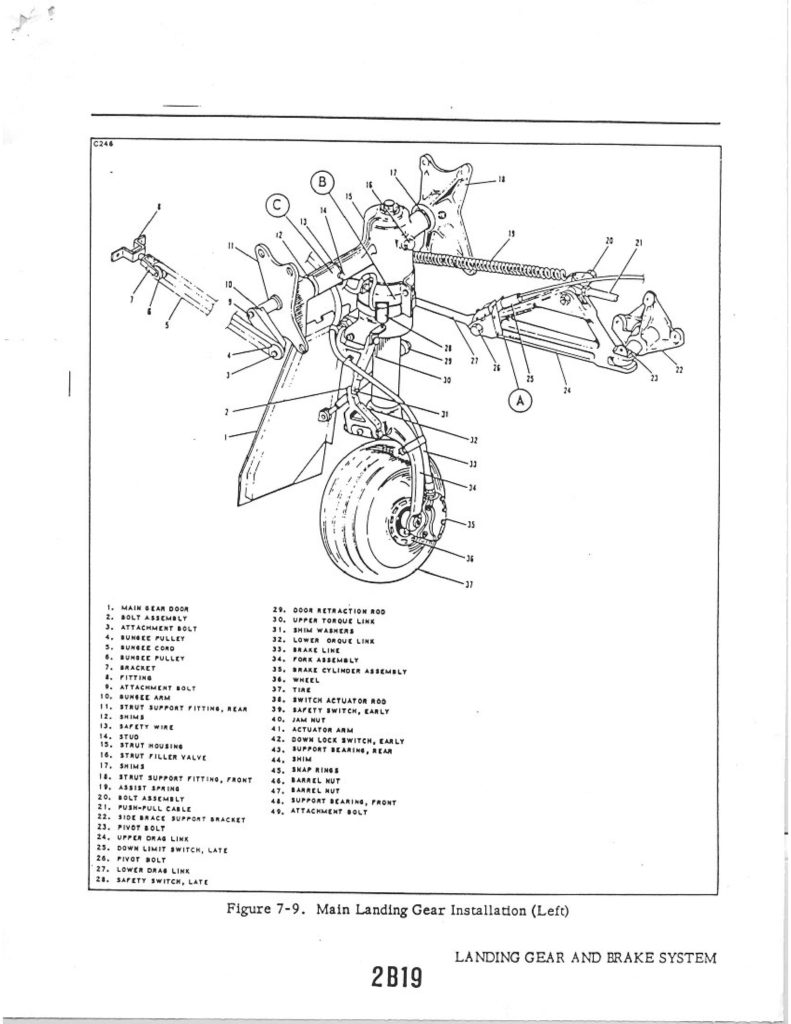
Bungee Roller and attach hardware detail; from a typical Piper Comanche Landing Gear Assembly Drawing.
Contact Comanche Gear
Please provide your complete details for invoicing such as your Card Billing Address, Shipping Address, and Aircraft Information. If you want to gab on the phone don’t hesitate to call, especially if you want to order something. If you have a problem-solving dilemma I can help with that too. This website doesn’t have internet ordering capabilities; that is for those more sophisticated. My email isn’t shown here because of scam artists and other shenanigans.