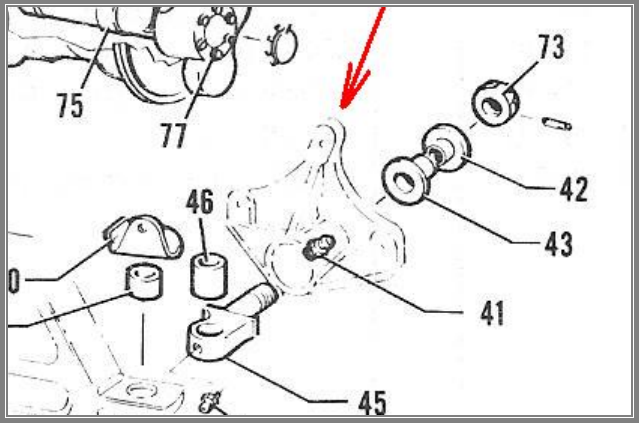
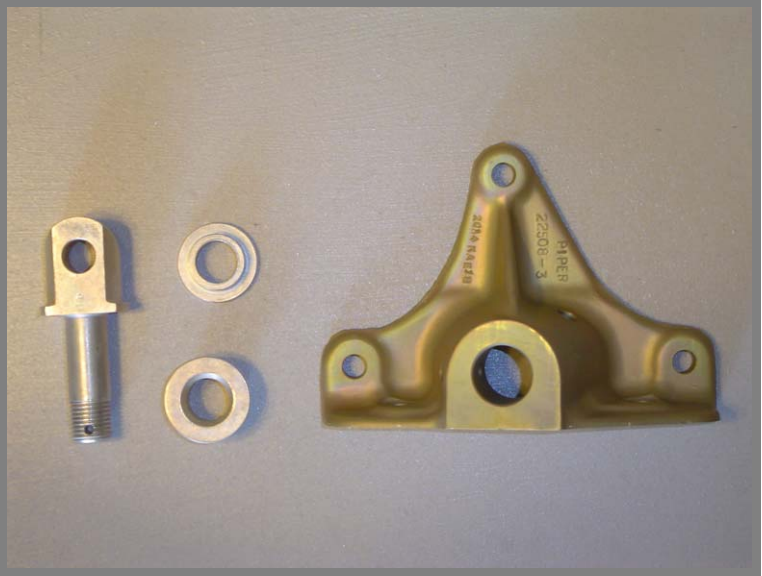
Main Landing Gear Side Brace Support and Stud Assemblies
Here are a few thoughts to consider while addressing the side brace stud and bushings during the 1000-hour gear Airworthiness Directive 77-13-21 part A. That AD applies to all of our Comanche fleet. If you need the tooling to measure the bushings for the AD, the ICS has them available for loan to current ICS members. Let me know, I also administer the ICS tool loan program. Another AD 97-01-01-R1 covers the side brace stud which is a part of the support assembly; likewise it has a 1000 hour period and applies to the entire fleet. I can send the side brace studs out for MPI [better than the dye penetrant method] and YT from a recognized qualified vendor; that will take care of the 2nd AD. It makes good sense to do both AD’s concurrently.
When replacing the bushings be aware that heating the aluminum before removal and installation is important, otherwise it is possible to damage the forging bore, and the result can be the new bushing may not have the required fit. These forgings were brutally expensive [$448] in 1998 when Piper discontinued them; be careful, they are currently NLA and you may be stuck with an unknown salvage part. Also important to know, after installation of the new bushings in the side brace support, they will require reaming to size and for hole alignment; that’s why Pipers’ bushings are under-size on the I.D. Why bushings – it is inappropriate to replace just one; you will never have alignment of the internal bores unless you replace both in one bracket, followed by the reaming operation. You must ream them or the internal bores will not be in alignment; think about it! In addition I use a hone after reaming to impart a cross-hatch finish for better lubricity.
Service offered – If the required inspection of the bushings turns up a defect and you don’t wish to perform the replacement of the bushings, send them to me. I will properly disassemble and inspect, and report any negative findings if there is a problem. The [serviceable] aluminum forging can be glass bead blasted, and Alodine® treated before insertion of the new bushings if you desire. Or if the paint is in good condition then I’ll leave them as-received, it’s your choice but keep in mind that the heating process may not be kind to the painted finish. They are then reassembled, lubricated, and ready for installation, the labor charge for this service is $75 per support assembly; you provide any necessary parts or I can procure them from Piper for you [I add only freight to Piper’s price]. Glass bead blast, Alodine®, prime, and white top coat adds $20 each forging.
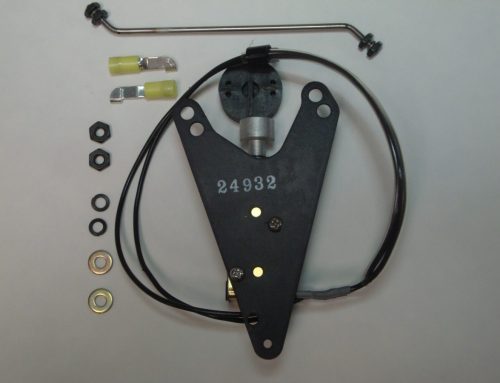
Parts Breakdown Extract from Piper Comanche Parts Catalog
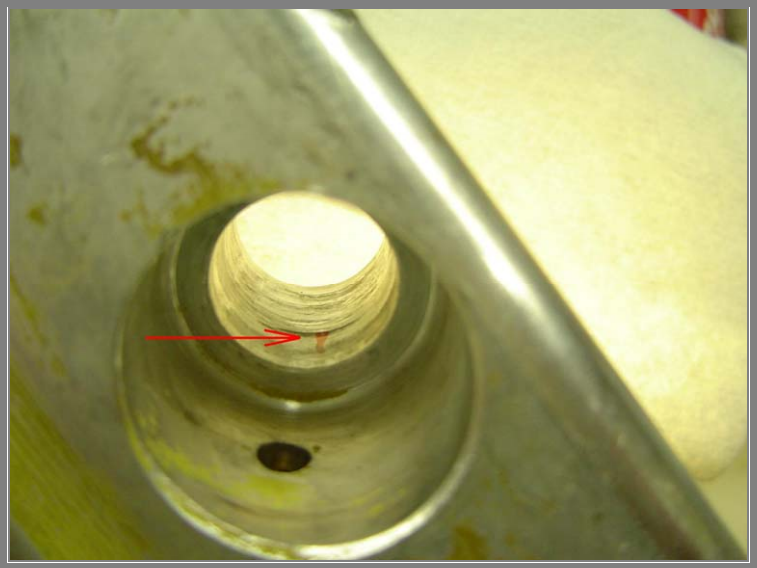
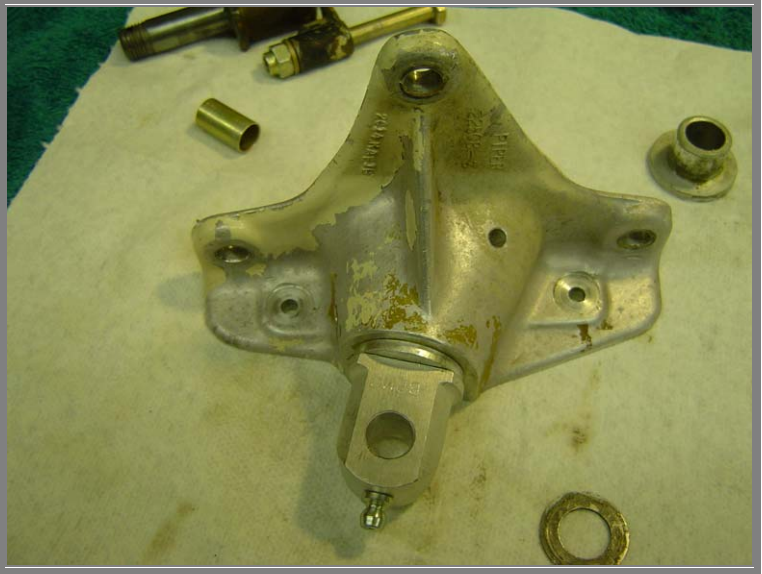
In this photo you can see the damaged bore in the forging; the red mark [arrow] shows where the bushing was “working”. This was probably caused by improper removal and installation of the new bushings; alignment is critical during assembly.
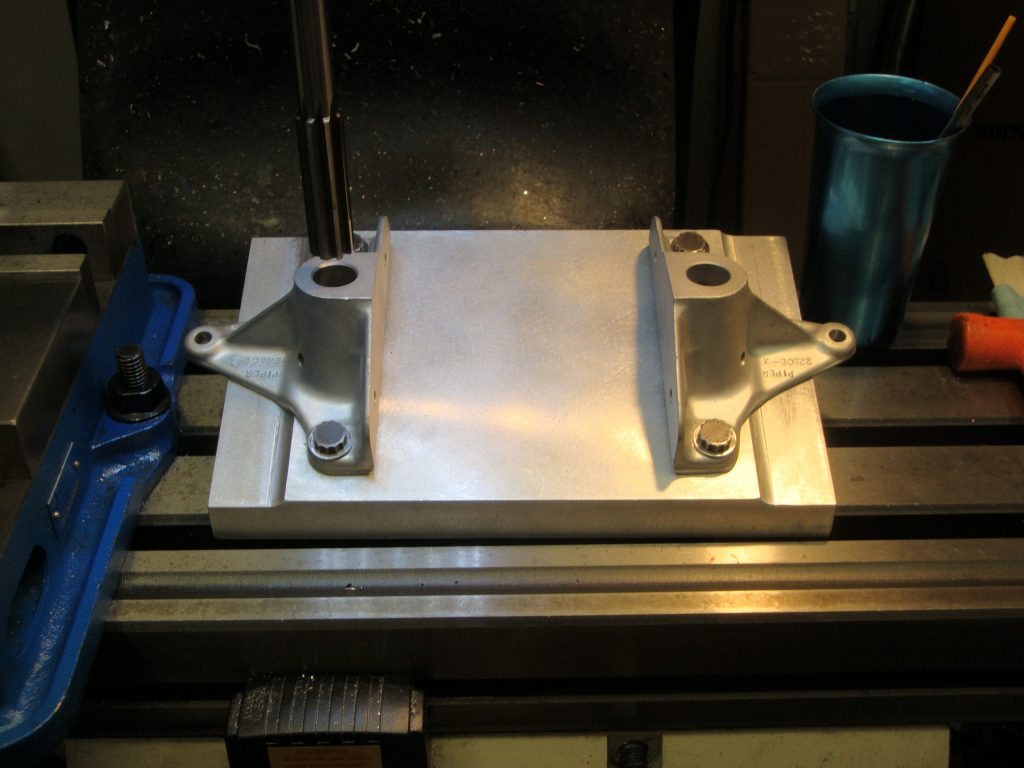
Reaming side braces for oversize bushings on the milling machine for accuracy.
Reaming side braces for oversize bushings on the milling machine for accuracy.
Side brace support glass bead blasted and Alodine treated.
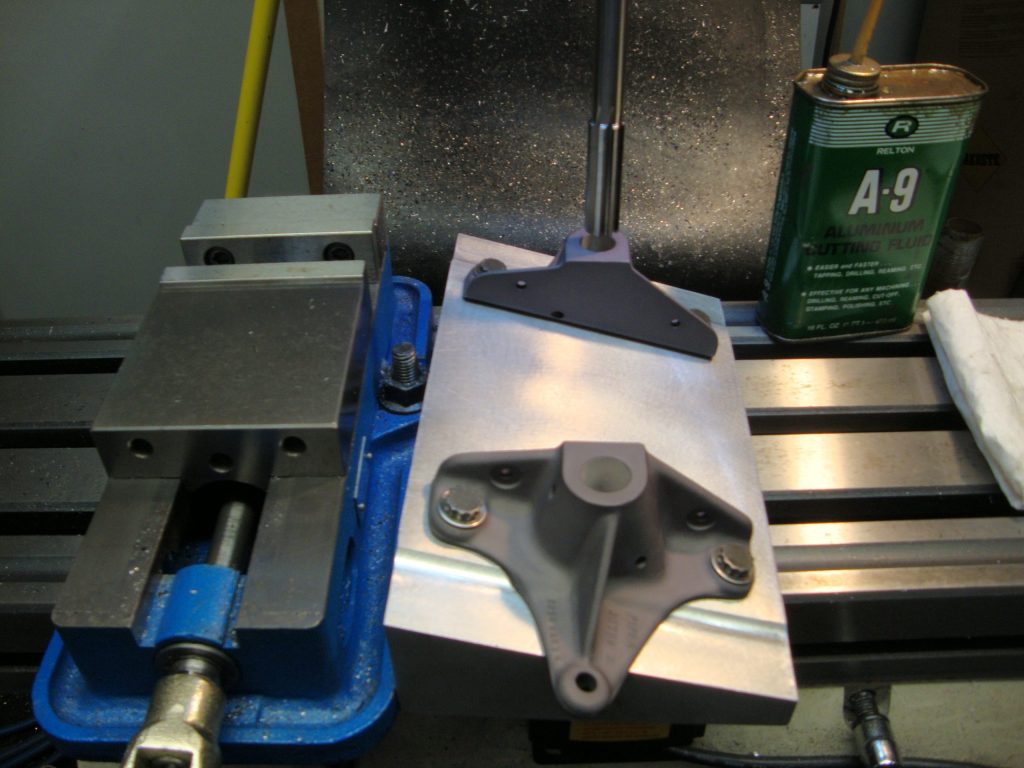
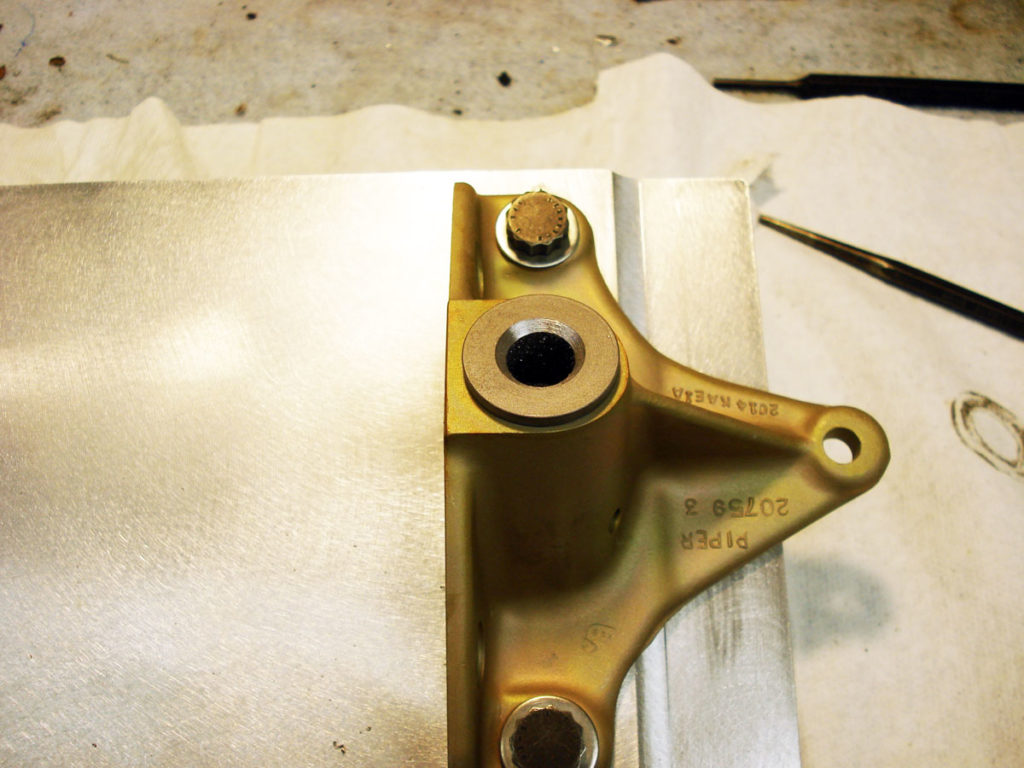
Another side brace support assembled and yellow tagged; this assembly has a new stud and bushings, no cosmetics.
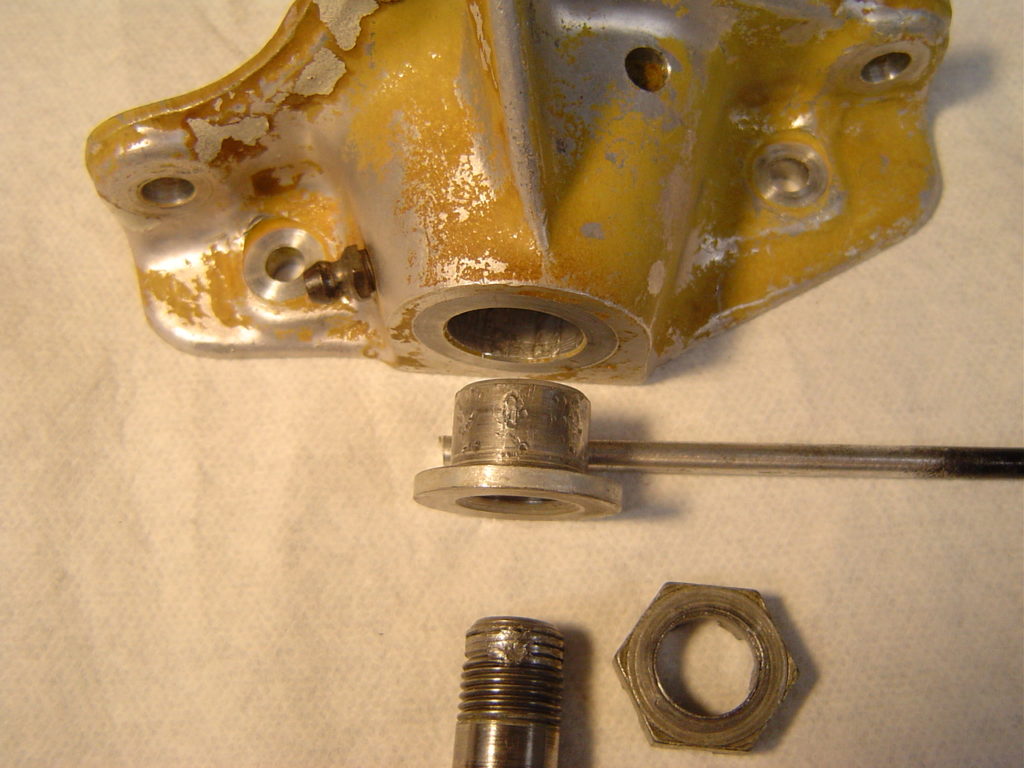
This one is pretty ugly; who in their right mind would attempt to “fix” a loose fit with a punch?
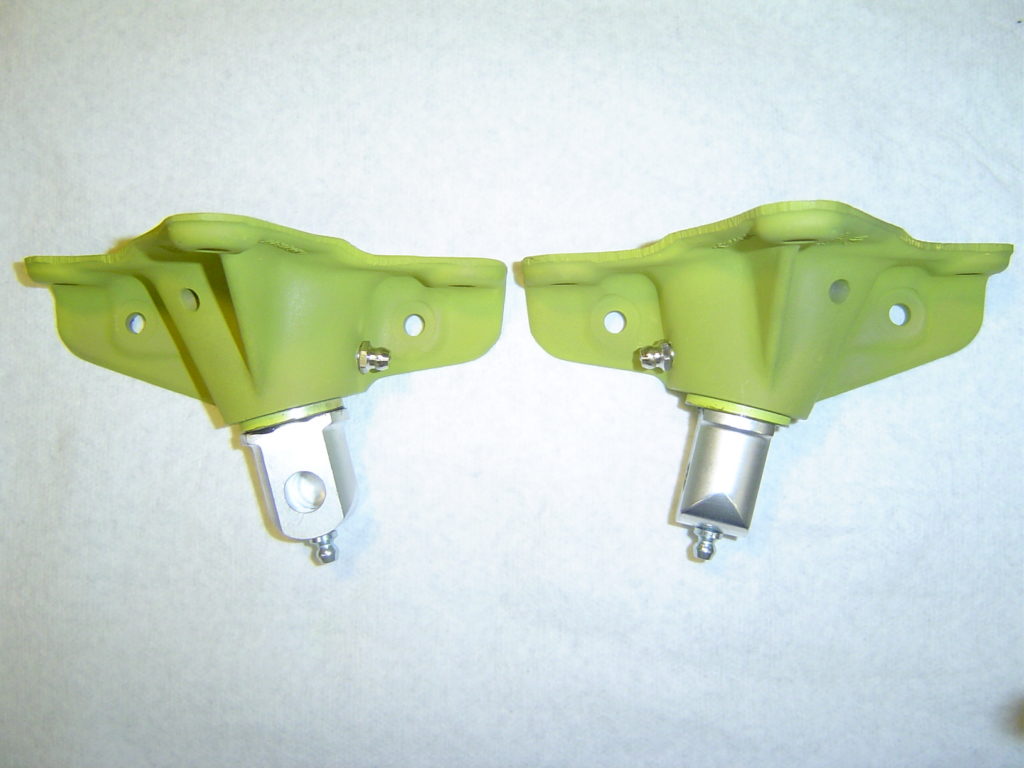
A different set of brackets after repair.
The side brace stud fitting assemblies pictured above have an Airworthiness Directive addressing the cracking of the side brace studs; see AD 97-01-01 R1 – a 1000-hour cycle irrespective of any part’s source.
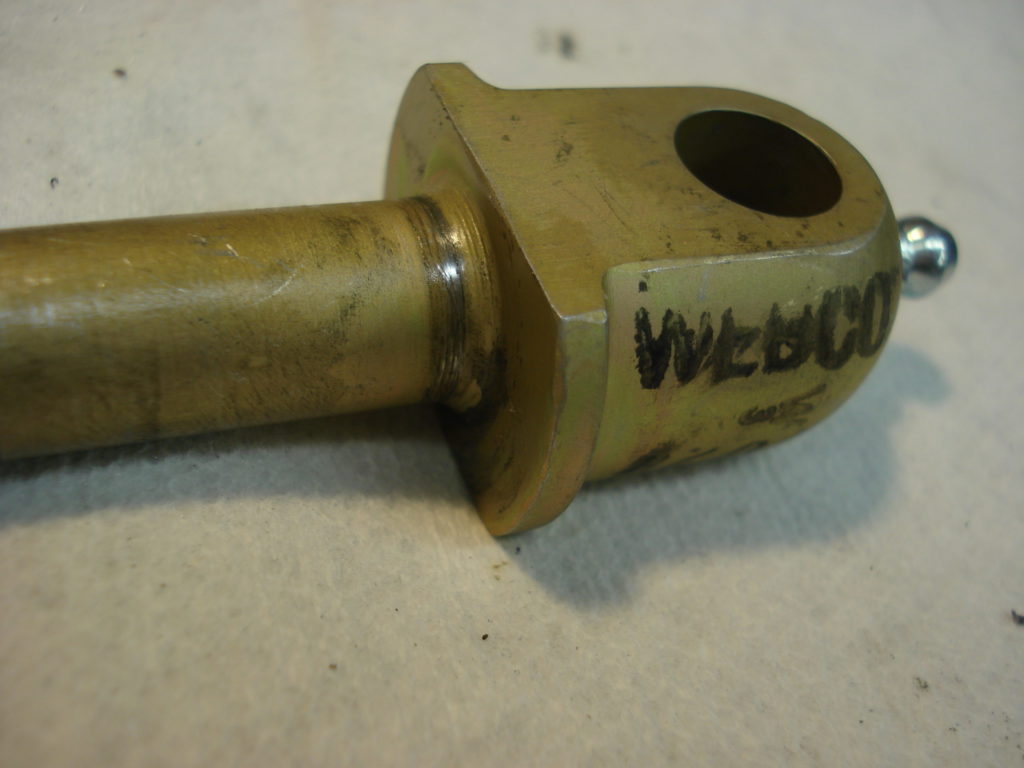
More to consider; notice the wear mark [shine area] at the radius of this side brace stud. The flange of the stud never makes contact with the face of the bushing; not good. This condition exists because the stud’s radius is not compatible with the bushing’s chamfer.
The cure is to enlarge the chamfer in the bushing.
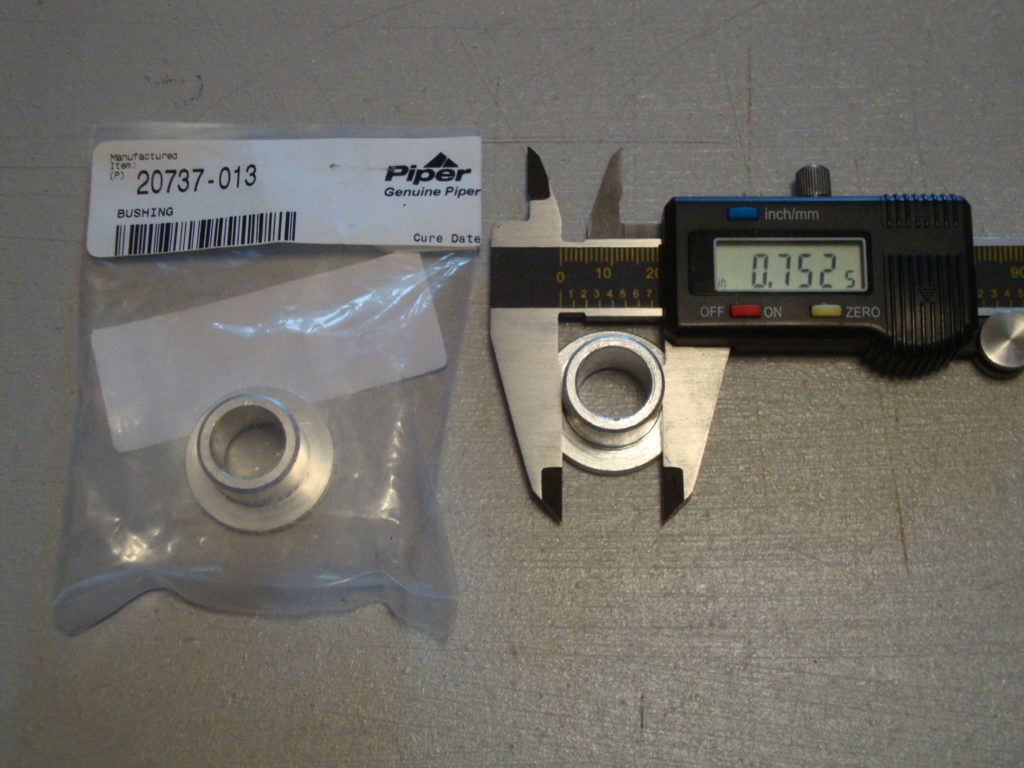
Measure the diameter of the bushing to assure proper fit in the side brace support.
Contact Comanche Gear
Please provide your complete details for invoicing such as your Card Billing Address, Shipping Address, and Aircraft Information. If you want to gab on the phone don’t hesitate to call, especially if you want to order something. If you have a problem-solving dilemma I can help with that too. This website doesn’t have internet ordering capabilities; that is for those more sophisticated. My email isn’t shown here because of scam artists and other shenanigans.