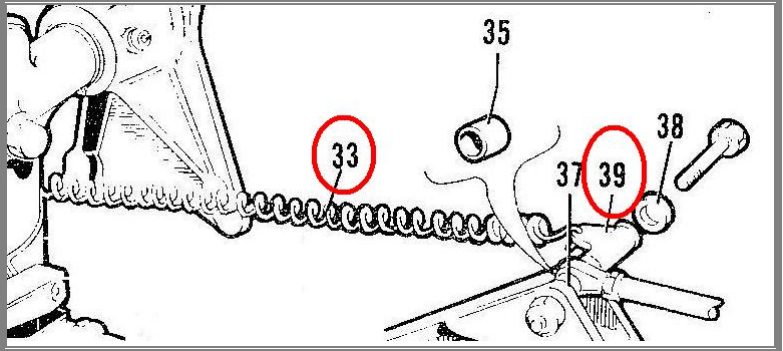
Here is what the Piper Comanche service manuals have to say regarding these springs #33 as illustrated below from the Single Comanche Parts Catalog. The Piper P/N is 487-347 – superseded from the old P/N 83302-040.
The following note is found in a SCSM revision dated 10/03/1977; you may not find it if your manual is an older version. And do the FARs not require the latest version manuals and supplements and SIs and SBs?
From the Piper Single Comanche Service Manual, section 6-33 – Installation of main landing gear, page 1J1. The corresponding Twin Comanche Service Manual section is 7-24, page 2B17.
NOTE
It is suggested that new springs be installed if new bungee cords are installed, to assure proper operation of the system.
By inference that means these springs are to be replaced each 500 hours time in service or 3 years, whichever occurs first; refer to AD 77-13-21, part B.
I’m making the assumption for this operation that the airplane is on jacks with the gear partially retracted. This would be the condition for replacing the bungees.
The swivel components #39 for the main gear assist springs. There’s a chance yours will look like those in the photo on the left above; rusted and ineffective.
While you’re replacing the MLG assist springs take a look at the spring swivels; they must rotate freely.
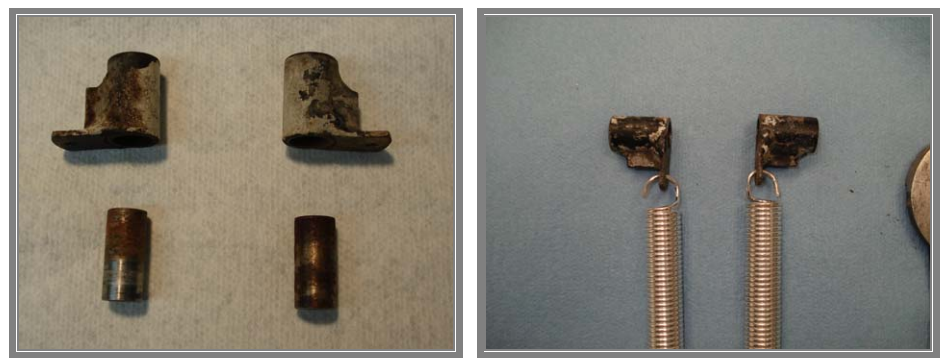
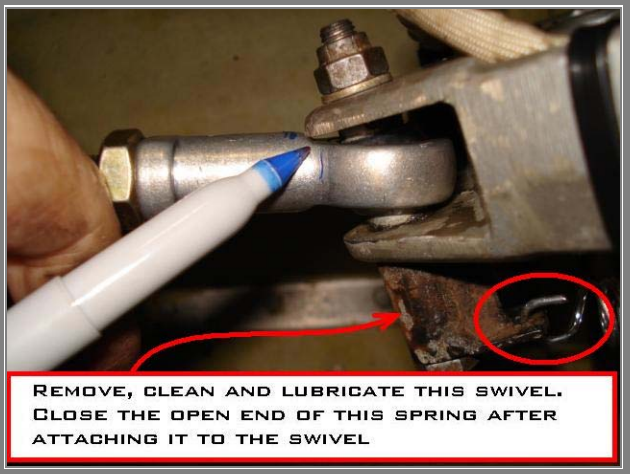
The springs P/N 487-347 as supplied from Piper have one tightly closed end which should be positioned outboard at the clevis pin. The more open end is shown in the photo above right, left spring; close this end after installing the swivel as above right, right spring.
Here’s the trick for removing the main gear assist springs. This is best done sitting upright on a creeper under a wheel well. Remove one end of the gear door retraction rod; this will allow strut movement without the door interfering with your process. Disconnect the drag link from the side brace stud [remove the AN2625 bolt], place the tire in your lap and hold the gear leg in a semi-retracted position, articulate the drag links to an acute angle, use a padded Vice-Grip® on the swivel to keep it from sudden release, and making bolt removal easier. Remove the AN4-23A bolt. I suggest using a ¼” tapered bolt/tool as a driver; possibly leave it in place until the new spring is installed.
To remove the outboard ends of the springs from the brackets you will find it much easier [one end of the gear door retraction rod disconnected] and swing the strut into the wheel well while holding it with your knee [you’ll be laying on a creeper for this operation]. Now you have access and can easily remove the cotter pin, washer and clevis pin and replace the spring. The factory-formed closed ends of these springs belong at the clevis pins. Before you install a new spring insert the swivel and close that end of the spring as in the photo above right.
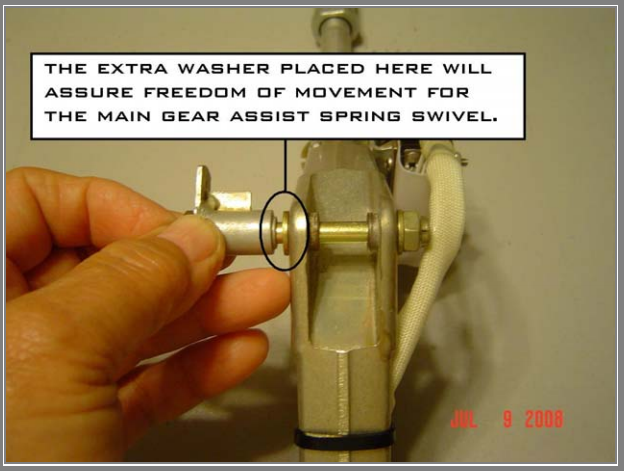
Here’s the trick for installing the main gear assist springs. This is best done sitting upright on a creeper under a wheel well. Use a small amount of Lubriplate® on the bushing for the spring swivel – see photos next page. Place the lubricated swivel assembly onto the bolt, and then add an additional 1/4″ washer [see photo below] before inserting into the drag link. This additional washer will assure the internal bushing for the swivel does not imbed itself into the drag link which would cause binding of the spring swivel – another hint from experience. Remember to maintain the proper thread exposure; use a thin washer if necessary. With the drag link still disconnected from the side brace stud and the door retraction rod disconnected, place the tire in your lap and hold the gear leg in a semi-retracted position, articulate the drag links to an acute angle.
Use a padded Vice-Grip® on the swivel and pull to stretch the spring and insert the AN4-23A bolt into the drag link and rod end bearing junction, this will force the ¼” tapered bolt/tool out. Install a new washer and nut and tighten this hardware. This bolt and nut combination is not meant to rotate; just the spring swivel rotates on its bushing. The nut must be in the aft position.
You may need to use a thin washer here to maintain proper thread exposure.
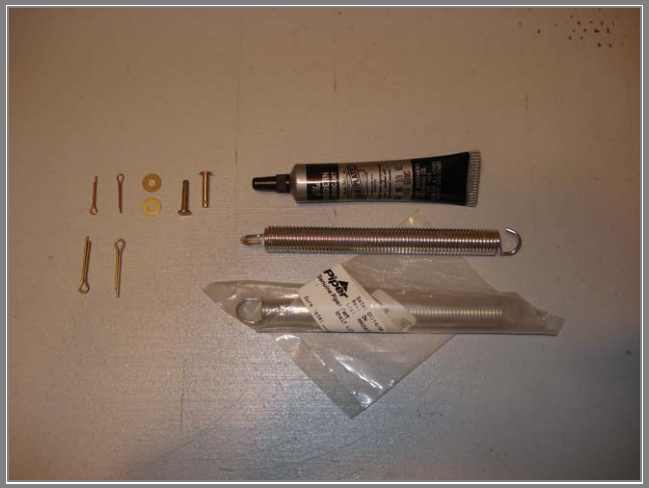
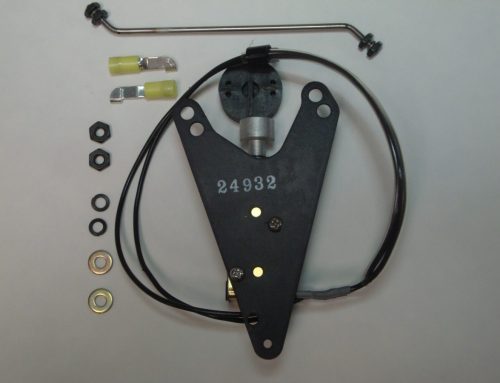
$60 Basic kit contents for replacing the MLG assist springs.
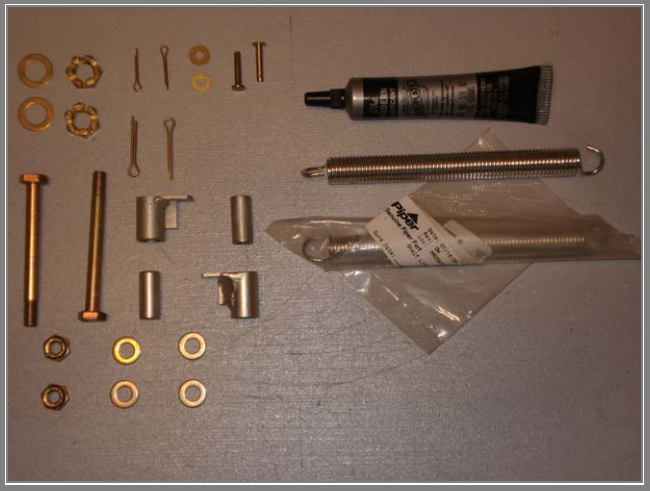
$95 Super-duper version with EXCHANGE-ONLY cadmium plated spring swivel assemblies.
The photo below illustrates two (2) issues, a MLG spring that hasn’t been replaced as required, and the bolt [see finger] is installed backwards.

Contact Comanche Gear
Please provide your complete details for invoicing such as your Card Billing Address, Shipping Address, and Aircraft Information. If you want to gab on the phone don’t hesitate to call, especially if you want to order something. If you have a problem-solving dilemma I can help with that too. This website doesn’t have internet ordering capabilities; that is for those more sophisticated. My email isn’t shown here because of scam artists and other shenanigans.